
Using SVG in Aurelia with a inline SVG custom element
Published , 7 min read (1371 words)
Maintaining a significant portion of inline SVG in your HTML pages isn't the most fun task and most of the times won't help you to understand your HTML code quickly.
Dwayne Charrington found a great solution for this problem by creating a custom element that replaces itself with external SVG (Inline SVG custom element for Aurelia). This is a very easy to use solution and works great! In my use case I also needed my SVG image to respond to changes in my application / modify it with bindings in Aurelia, which isn't possible (or I don't know how to do it :-)).
I've played around a bit and came up with the following modification to resolve this specific case. I extended his idea and made it possible to, for example, bind to the attributes of a given SVG object or repeat a given SVG object with a repeat.for.
To demonstrate this I will use a very simple view of 5 stars, that change to circles once you press the button 'click me to change type!'.
The 5 stars loaded by default: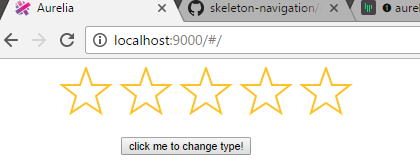
Once clicked, the stars change to circles: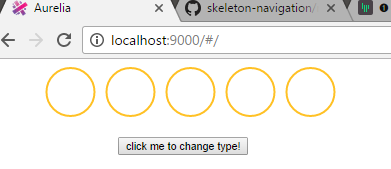
Creating the SVG #
First, we need an SVG file to load. The SVG file type allows you to define resources in the defs section. We can easily use this section to define our objects that we will, later on, use to generate our visible SVG image.
As you can see below, this contains a path with an id of star and a circle with the id of circle. We will use the repeat.for functionality, later on, to repeat this star/ circle for each of the answers.
If you open up this SVG file it won't show anything, because everything is a resource/ not added to the visible view of the SVG file.
answers.svg
html
html
Extend the inline SVG custom element #
We will take the <inline-svg> element created by Dwayne Charrington and extend it to:
- Let Aurelia know it should not process the content inside the custom element (We will perform this task in the custom element logic).
- On binding or changing of the source svg image we take the image and combine it's content with the content inside the custom element.
- Make use of the
TemplatingEngine.enhancemethod to let Aurelia know about the combined content and let it process it like it does with normal HTML.
Add an extra property named model, which is the model used when performing the enhance method.
inlineSvg.ts
typescript
typescript
Using the inline-svg custom element #
Next up is using the extended custom element. We will create a very basic example view model containing a question object with 5 answers and a color and type property and a changeType method that will switch the type of the question.
app.ts
typescript
typescript
Next we create the view itself containing the inline-svg custom element with the answers.svg SVG as source and bind the model attribute to the question property on the view model. This will load and combine the SVG with the content of the custom element.
One important part of the content of the custom element is the use element, specifically the xlink:href attribute on the element. This allows us to use one of the resources defined in the defs section of the SVG and will make the star object visible. For demonstration purpose, this is a simple object, but it could also be a group <g> of objects containing multiple objects.
The styling of the imported SVG object can still be done by using a standard class attribute (see the .stars selector), or you style it using the default styling attributes (see: stroke.bind='color').
The SVG object we have in the resources definition (<defs>) of our SVG is only a single star and or circle. What I want is an SVG object(star/ circle) for each of the answer objects in the answers array. To accomplish that I will use the Aurelia repeat.for attribute and repeat the star object for each answer and modify it's position by binding the x position to the index * 60 (otherwise they all overlap).
Because Aurelia allows you to bind to any attribute, you can also bind the href attribute that points to one of the resources in the <defs> section and modify it.
That's what we do with xlink:href.bind="type" and the button's click delegate method changeType. So that allows us to switch from the star reference to the circle reference.
app.html
html
html
Conclusion #
We now have a custom inline svg element, which allows us to create complex SVG images and store most of the SVG definition outside of our HTML page, but still use bindings and/ or delegate events on the parts we care about.